Photoshop’s new SUPER Resolution feature
Photoshop has come out with some fantastic new features over the last couple of years, and the Super Resolution feature promises to add to their arsenal of high-tech tools.
This nifty new tool takes any image, and quadruples the pixels in it by extending the image length and width by double the number of pixels. This essentially allows you to increase the image resolution without losing image quality. Until now, the only way to increase your image resolution in Photoshop was to increase the image size, but the technology to do this did not sufficiently ‘fill in the gaps’ adequately enough, and it was quite often obvious there was quality loss in doing so
The new Super Resolution tool uses complex artificial intelligence to adapt the new pixels to the image in a way that is pretty hard to detect! Watch and read on as I take you through the steps to use it and some pros and cons to this new feature…
WHERE DO YOU FIND IT?
Super Resolution, at the time of writing this article, is only found in Adobe Camera Raw (ACR). If you are opening a RAW image into Photoshop, ACR is the default interface that opens the image.
Step One - Open the file in ADOBE CAMERA RAW
For a Raw file, you can either open the file from within Photoshop by going to File > Open, then locating the raw file on your file system. You can also open a raw file by double clicking it from with Adobe Bridge, if you are a Bridge user.
Once you have opened your image in ACR, this is what you will see:

Step Two - Open the Super Resolution menu
To find the Super Resolution feature, click on the extended tools menu (3 dots) and Select Enhance:

Step Three - Apply Enhance
Depending on how much grunt your computer has, this can take a little while to apply!

Step Four - the new enhanced file will be created
When it is complete, you will see the newly created enhanced dng file.
Take note of the new pixel dimension of the file - these are now double the original image!

Step Five - Open to continue editing your image in Photoshop
Open the new dng file into Photoshop for editing
Comparing before and after:
On the image I trialled initially, I couldn’t see a huge difference between the original raw file and the enhanced file. I suspect this might be because the original file was a large file anyway (shot on the Canon MK IV) and was fairly sharp in the intended areas already. There is a little increased sharpness just noticeable in the hair, but to the naked eye, it’s barely noticeable.


Where this tool comes into its own
On an already high quality image, you may not notice a huge amount of difference, apart from the actual increase in pixel dimensions. However, when it comes to working on images that are not as big (for example, shot on older cameras with smaller sensors OR not on raw files at all, but on jpegs) you may find this tool super handy.
And where this tool REALLY comes in handy is when you want to take your digital images and print them. PRINT THEM BIG! Ever printed off an old image of yours and got it back from the printers disappointed, with blocky, blurry, less than appealing quality? This tool will help to artificially increase the resolution of your image allowing better quality at print time.
Some words of caution:
After trialling a few different images through the new tool, I found a couple of issues.
Firstly, it is important to understand the Super Resolution tool is not meant to create sharper images, even though it does tend to increase sharpness across an image.
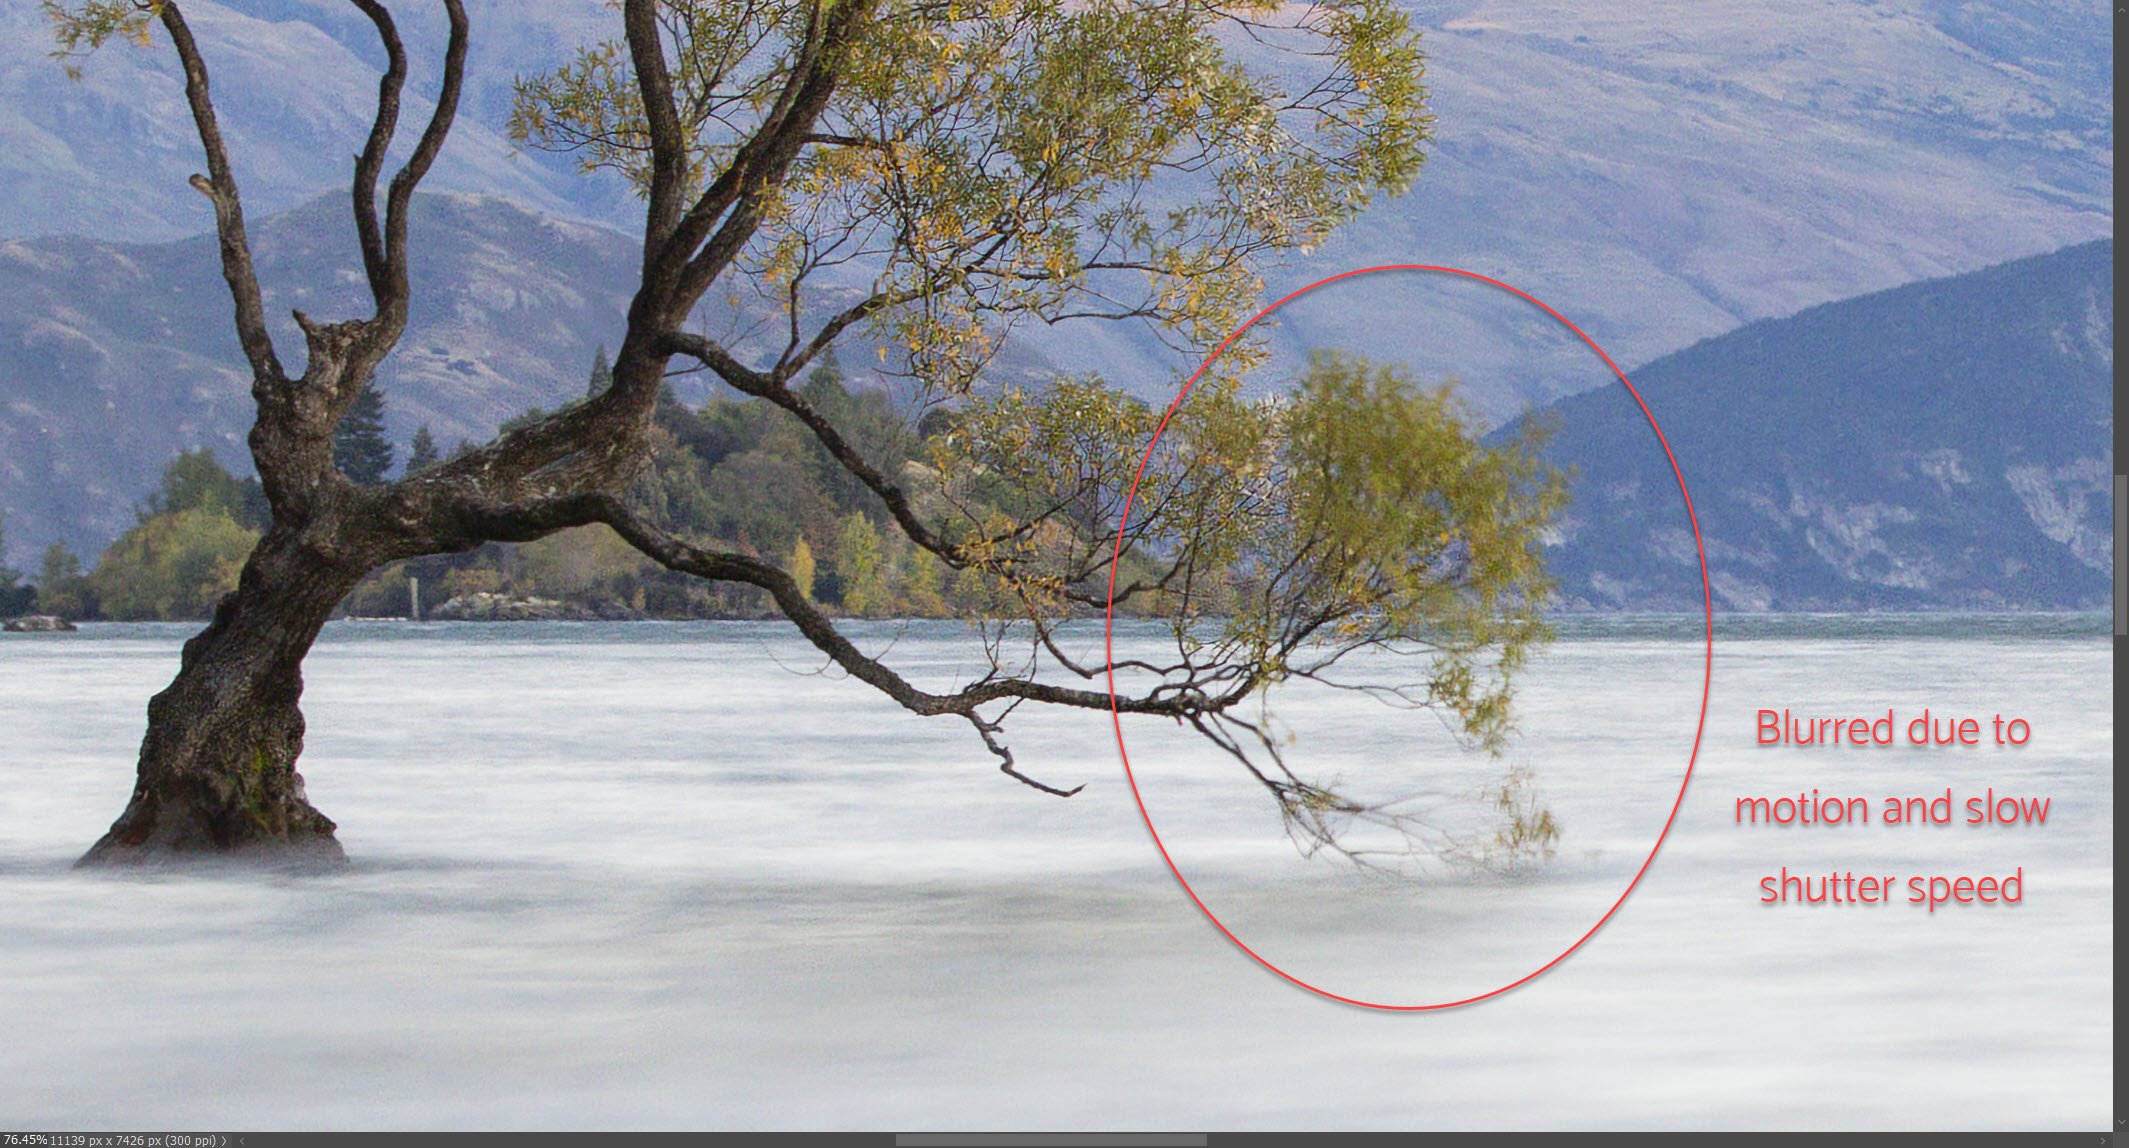
What it won’t do all that well, is sharpen an image that is blurred due to motion blur due to slow shutter speed.
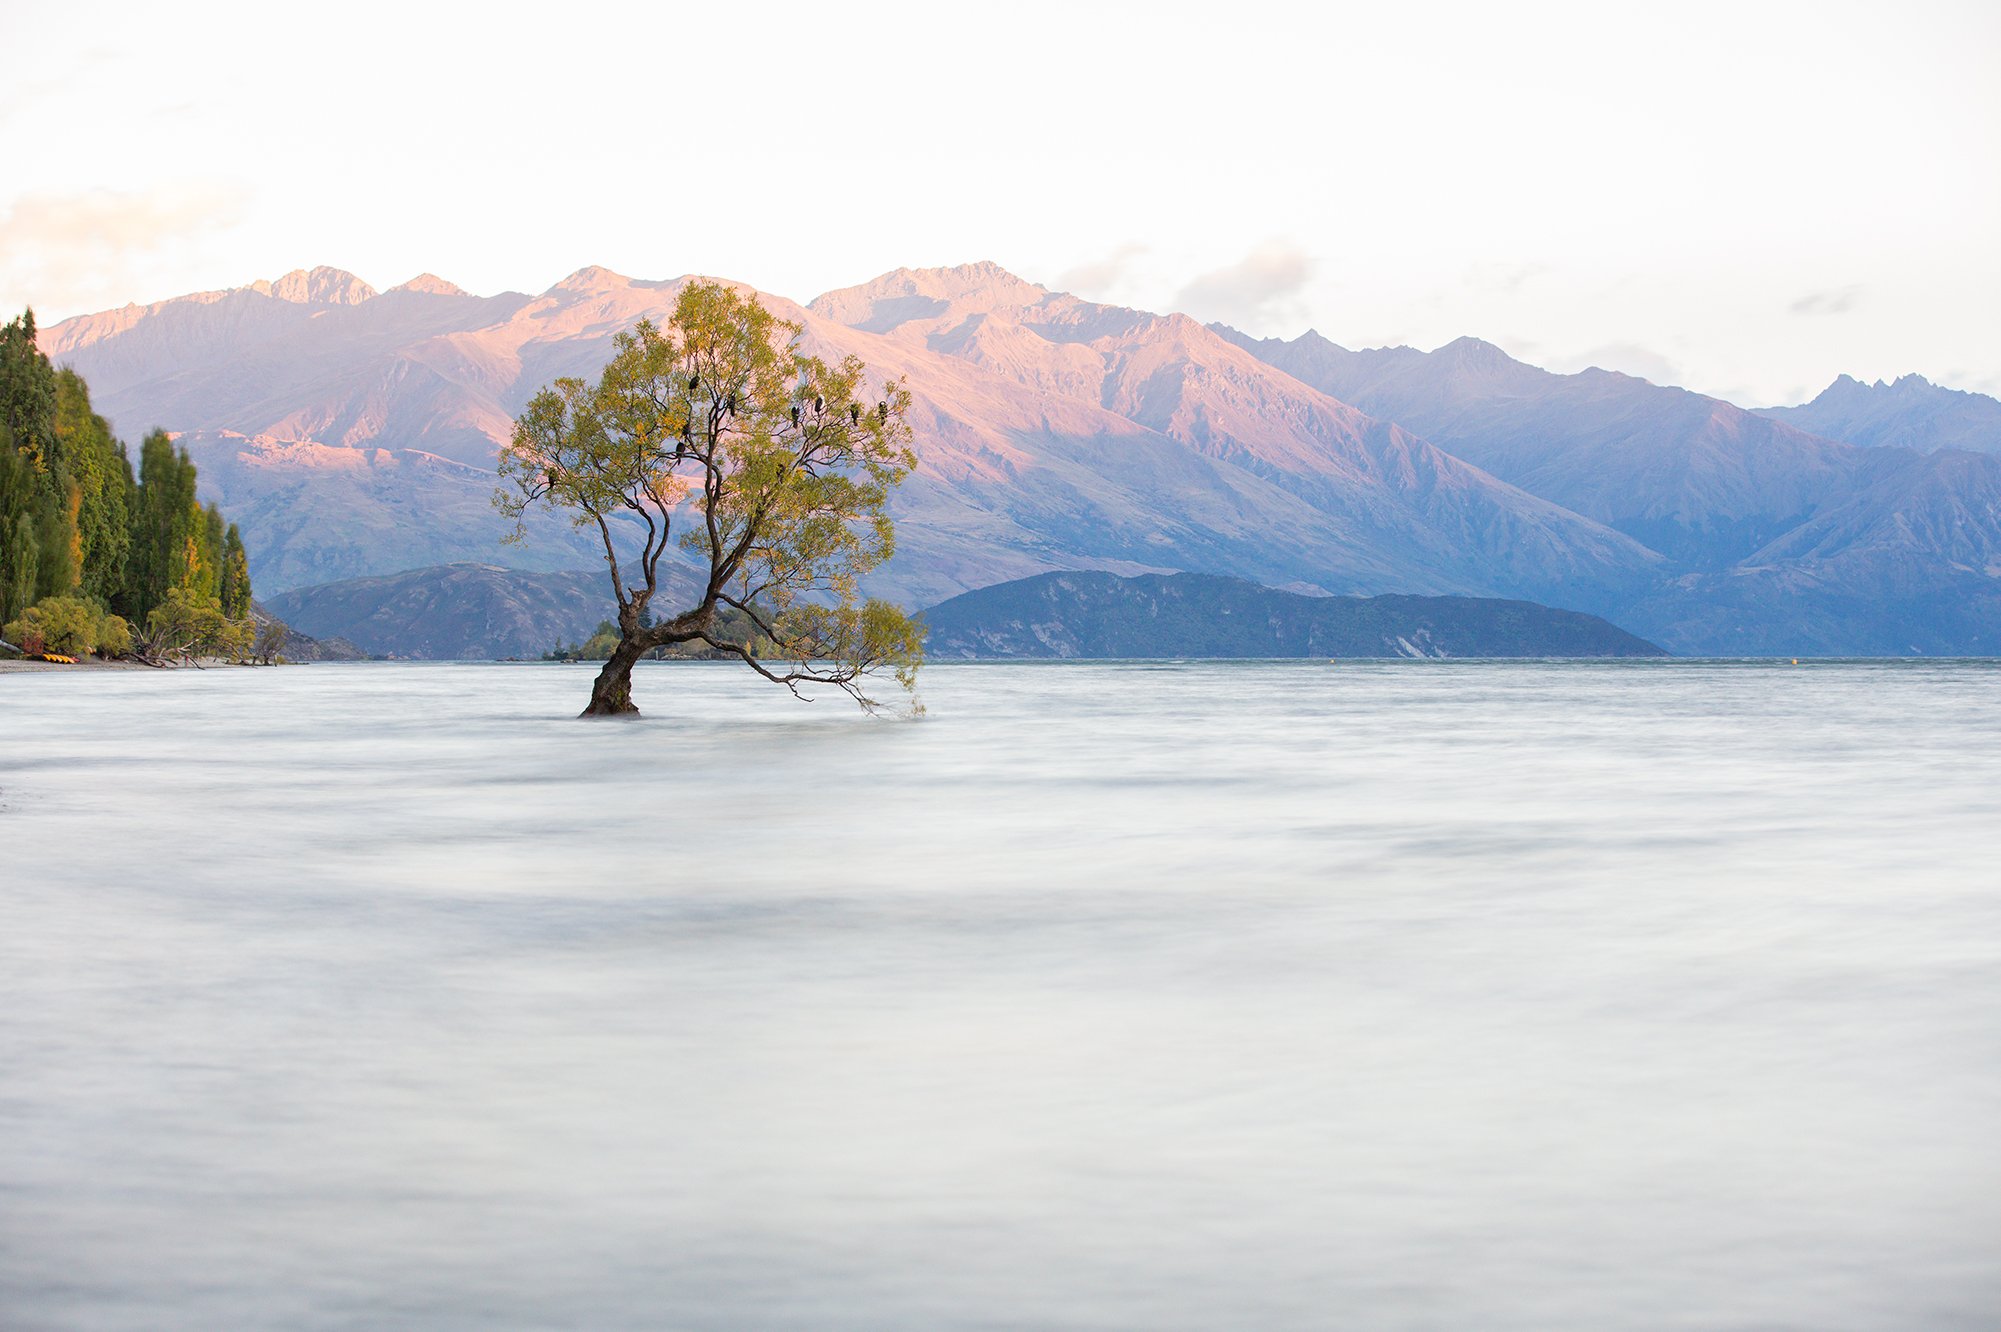
This image here was intentionally shot at a longer shutter speed, to create a milky effect to the water, but due to a slight breeze, the branches in the lower part of the tree were swaying in the breeze and sharpness is not really retrievable, even with the ‘most SUPER’ of tools!
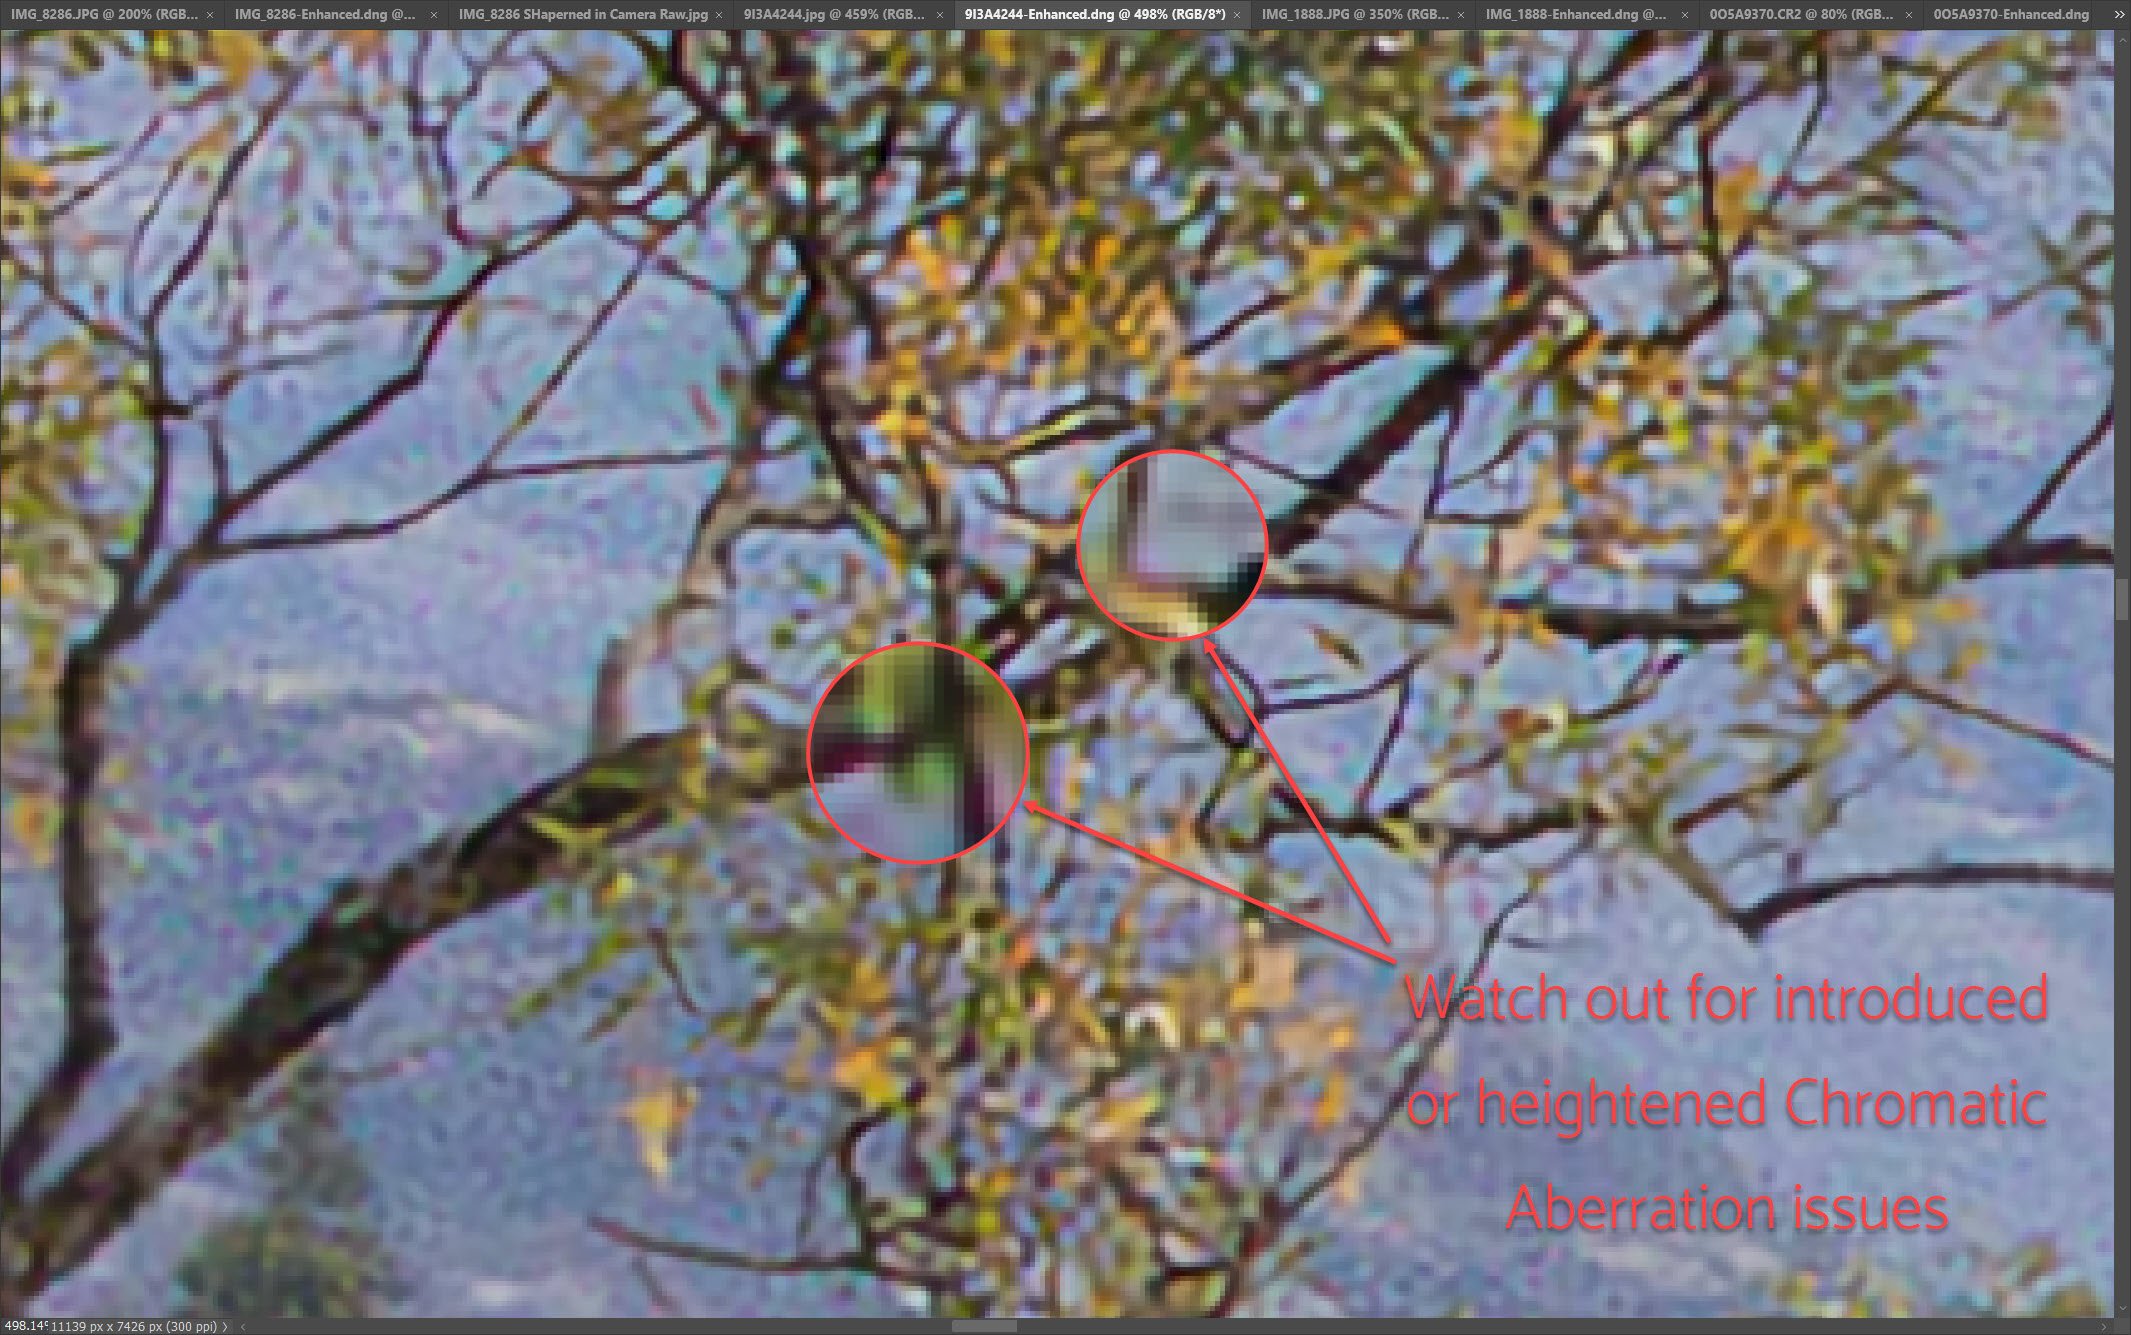
On the same image, I found after applying Super Resolution an increase to the Chromatic Aberration throughout the image, see here:
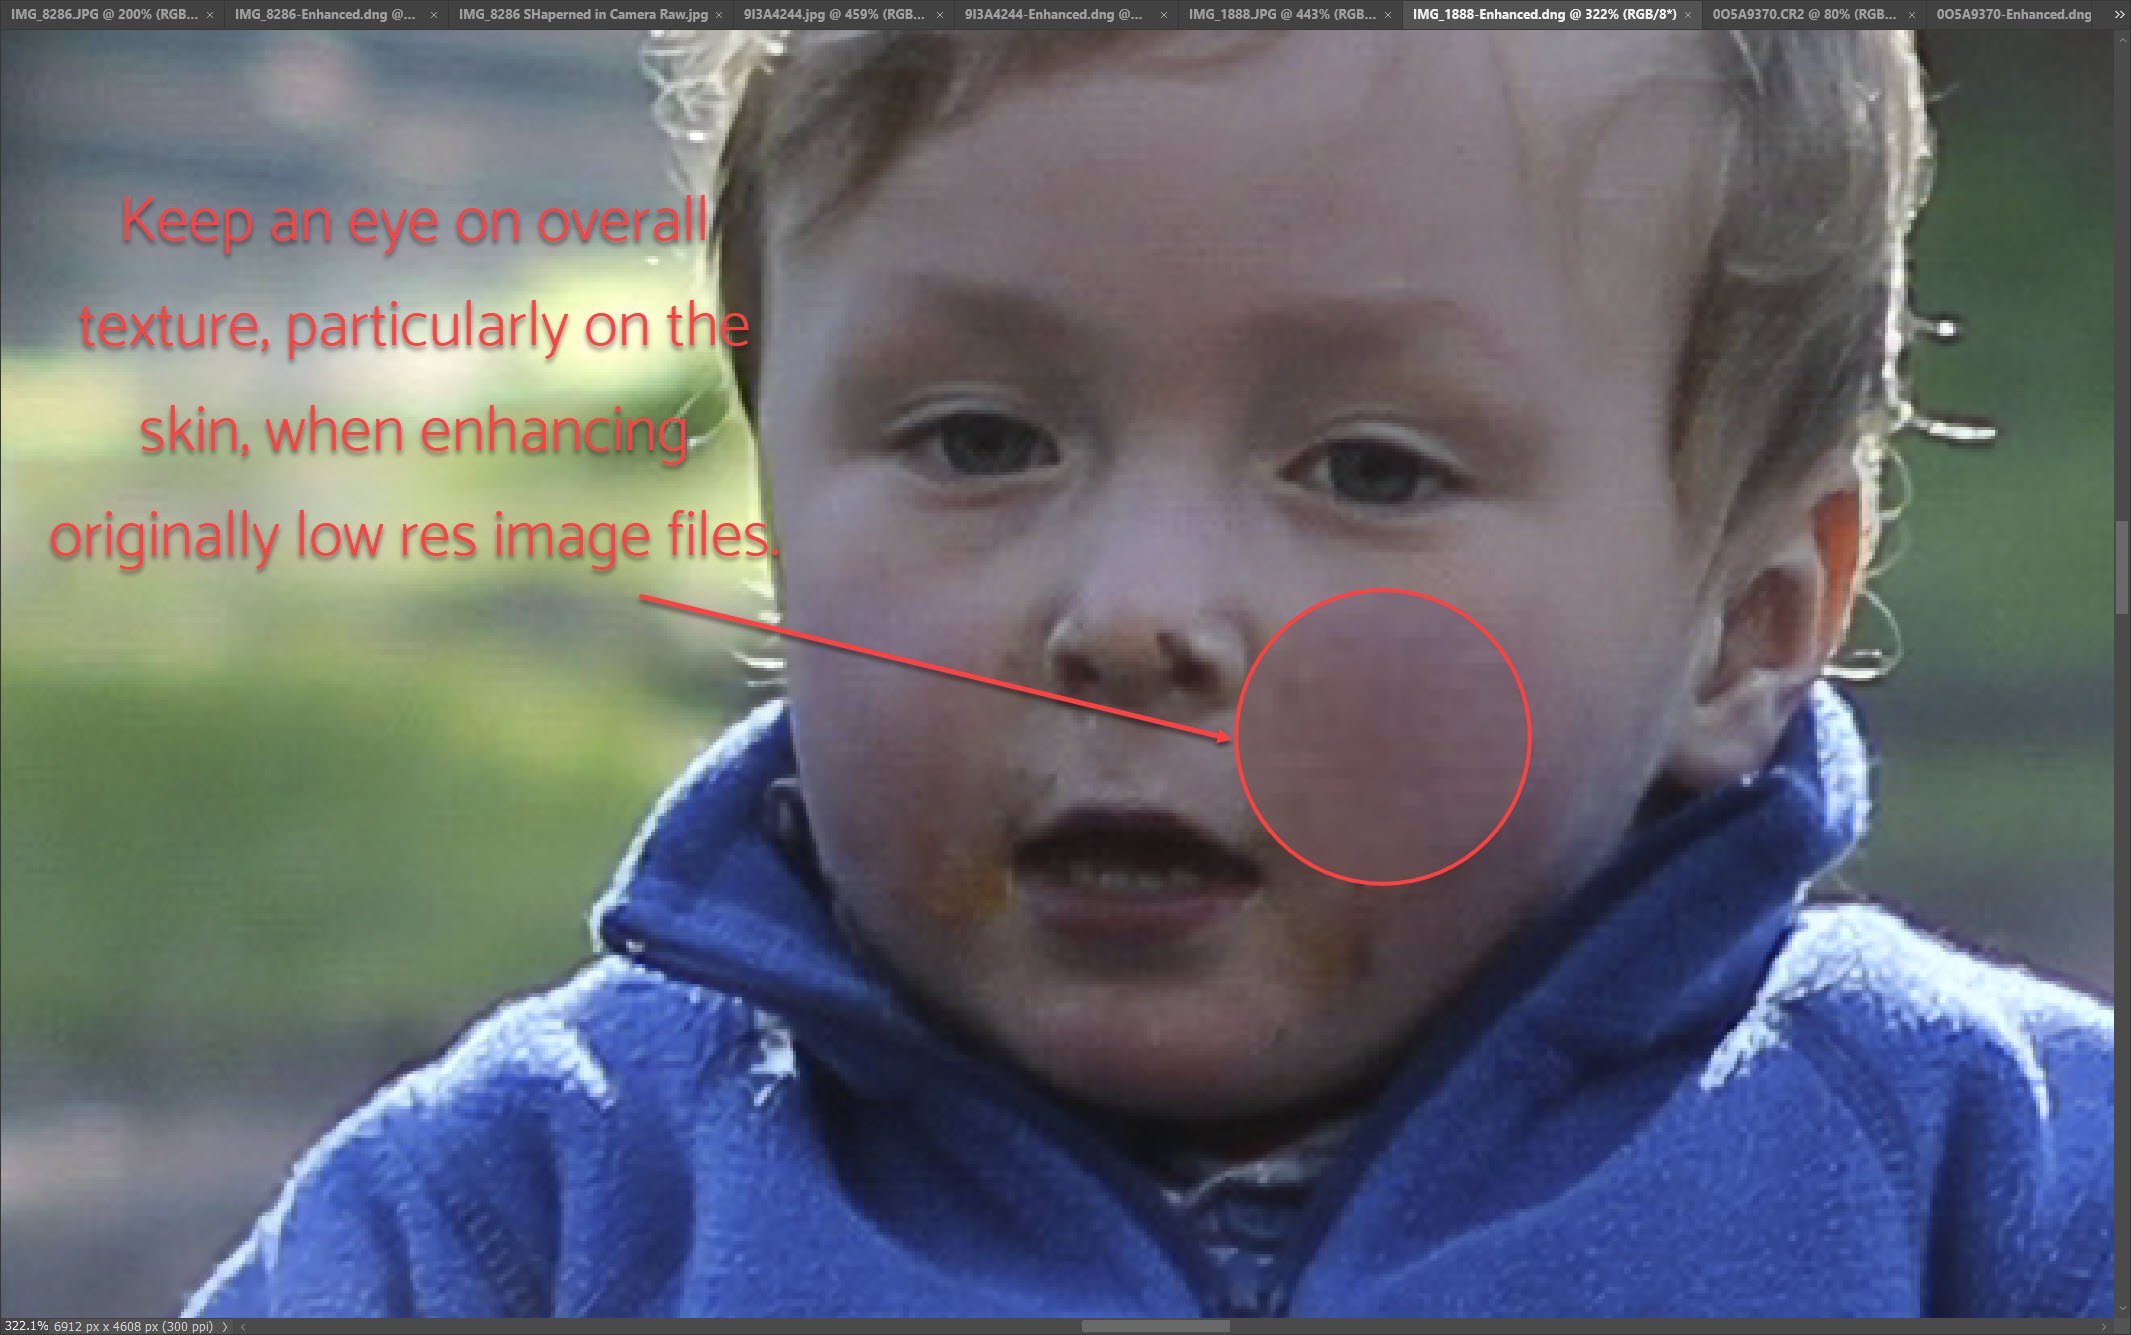
You also need to be careful when applying Super Resolution to fairly low quality raw images, or moreso, jpeg images.
This image here was shot on an old camera, in jpeg (compressed) format straight from the camera. The image itself doesn’t have optimal sharpness and, after applying Super Resolution, you can see an unpleasant, blocky texture across the skin texture of my sons face:

In Summary …
While this feature certainly does offer a great option if you want to increase the image size of already good quality images, it does have some downfalls when dealing with not so optimal quality images.
But like all new things, best to give this feature a whirl for yourself and see how it works for you!