What’s New in Photoshop 2023
Get ready to take your digital design skills to the next level, because Adobe Photoshop 2023 is here with a whole host of exciting new features that will blow your mind! Along with improvements in existing tools , Photoshop 2023 is packed full of new tools that will make creating stunning images and artwork even easier and more fun than ever before. So buckle up and get ready to dive into all the awesome new features that Photoshop 2023 has to offer, because this is one update you won't want to miss!
BEFORE WE START…
All of these new features are only available in Photoshop 24.5.0 onwards. You will need to do an update to your Photoshop version prior to trying out these new tools.
On top of that, some of the new features that Photoshop have released are out on a ‘Beta’ version. What does this mean? Essentially, Photoshop have released some features on a trial version (the Beta version). Doing this allows them to give real users an opportunity to play with the features and Adobe can continue to work on finessing them prior to its official release on a future Photoshop upgrade.
If you haven’t already installed Photoshop Beta, follow these steps…..
Log into your Adobe Cloud Subscription
On the left-hand menu of the Adobe Creative Cloud App, you will see an option for ‘Beta Apps’. Click on this.
On the Photoshop Beta option, click Install.
Open the Photoshop (Beta) app, either from Adobe Creative Cloud OR from your computer’s app menu.
CONTEXTUAL TASK BAR
One of the first things I noticed after opening Photoshop 24.5.0 was the floating bar they call the Contextual Task Bar.
This nifty little bar follows your cursor around your workspace, and the options will refresh depending on the layer type you are on and the tool you have selected from your Tool bar. For example, here I am on the Lasso Selection tool and you can see the Contextual Task Bar has various options that are related to selections:
Here, I switched to the Transform tool, and you can see the options are now related to Transform actions:
CONTEXTUAL TASK BAR TIPS:
Hover over each icon if you are unsure of what the task is
You can drag and move the contextual task bar by clicking on the horizontal bar at the left and moving it around your workspace
You can pin the task bar in place by clicking the 3 dot menu and choosing ‘Pin bar position’.
Similarly, if you want to hide the bar altogether, on the same menu, select ‘Hide bar’
If you cannot see your Contextual Task bar, go to Window > Contextual Task Bar.
ADJUSTMENT PRESETS
While you are all likely familiar with the Adjustments Panel in Photoshop, the latest version of Photoshop has included a new Adjustments Presets panel which is essentially a selection of presets, grouped into various categories like Portraits, Landscape, Photo Repair, Creative and Black and White.
These can be found in the Adjustments Panel - usually located above the Layer Palette, but if you cannot find yours in your workspace, go to ‘Window > Adjustments’.
Clicking on any one of these will add one Adjustment Layer (or sometimes, more than one) to your layer stack, in a neat little group.
ADJUSTMENT PRESETS TIPS:
Use the presets to give you ideas on the direction which you might want to take your edit
Hover over an Adjustment Preset with your mouse/cursor to first see a preview of what it will look like
You can try out more than one preset, and switch them on and off by using the eye icon on each group to see which one is best suited to your image
Use a preset as a starting point, but don’t forget you can go ahead and make fine tuned changes to each of the layers (and add more adjustments), just as you would normally with any adjustment layer.
REMOVE TOOL
Adding to the already great suite of clean up tools, Adobe have introduced the Remove Tool, which looks to be a very promising tool for removing objects in your images. It works by simply brushing the tool over the area you would like removed.
As you do this, you will see a coloured mask on the area you have selected (the pink area in the example below). Once you release the mouse button, Photoshop will use advanced technology to replace the area with what it believes should be there instead.
In the example below, you can see it has done a pretty great job of removing the construction worker and a few tourist legs from the background of this image:
As a comparison, I used the Spot Healing Tool and then the Content Aware Fill tool for the same job. You can see the results below. You decide which tool did the better job!
REMOVE TOOL TIPS:
When brushing over the object you want to remove, be sure you go right over the edge, including all of the object to ensure there are no nasty blurred artefacts left after the tool finishes its magic
Always use this tool on a copy of your background layer, and never on the background layer itself. This will ensure you can always return to your original base layer and work in a non-destructive manner
Always consider using multiple healing tools to get the best job done. You might find you may still need to do a little more clean up with other tools such as Clone Stamp, Patch Tool etc, after running the Remove Tool over an area
LIVE GRADIENTS
If you are one to use gradient adjustments in your editing workflow, I believe this new feature in Photoshop 2023 is a game changer! Photoshops Live Gradients allow us to add gradient fills and manipulate placement, gradient positioning, add gradient stops, and adjust colour and opacity all while seeing real-time changes.
You access Live Gradients simply by selecting the Gradient Tool from your toolbar. Make an initial selection of the gradient you would like, for example, a Radial Gradient in an Orange to Pink was selected here:

Once you have selected your gradient, you can click and drag it in roughly the position you would like it.
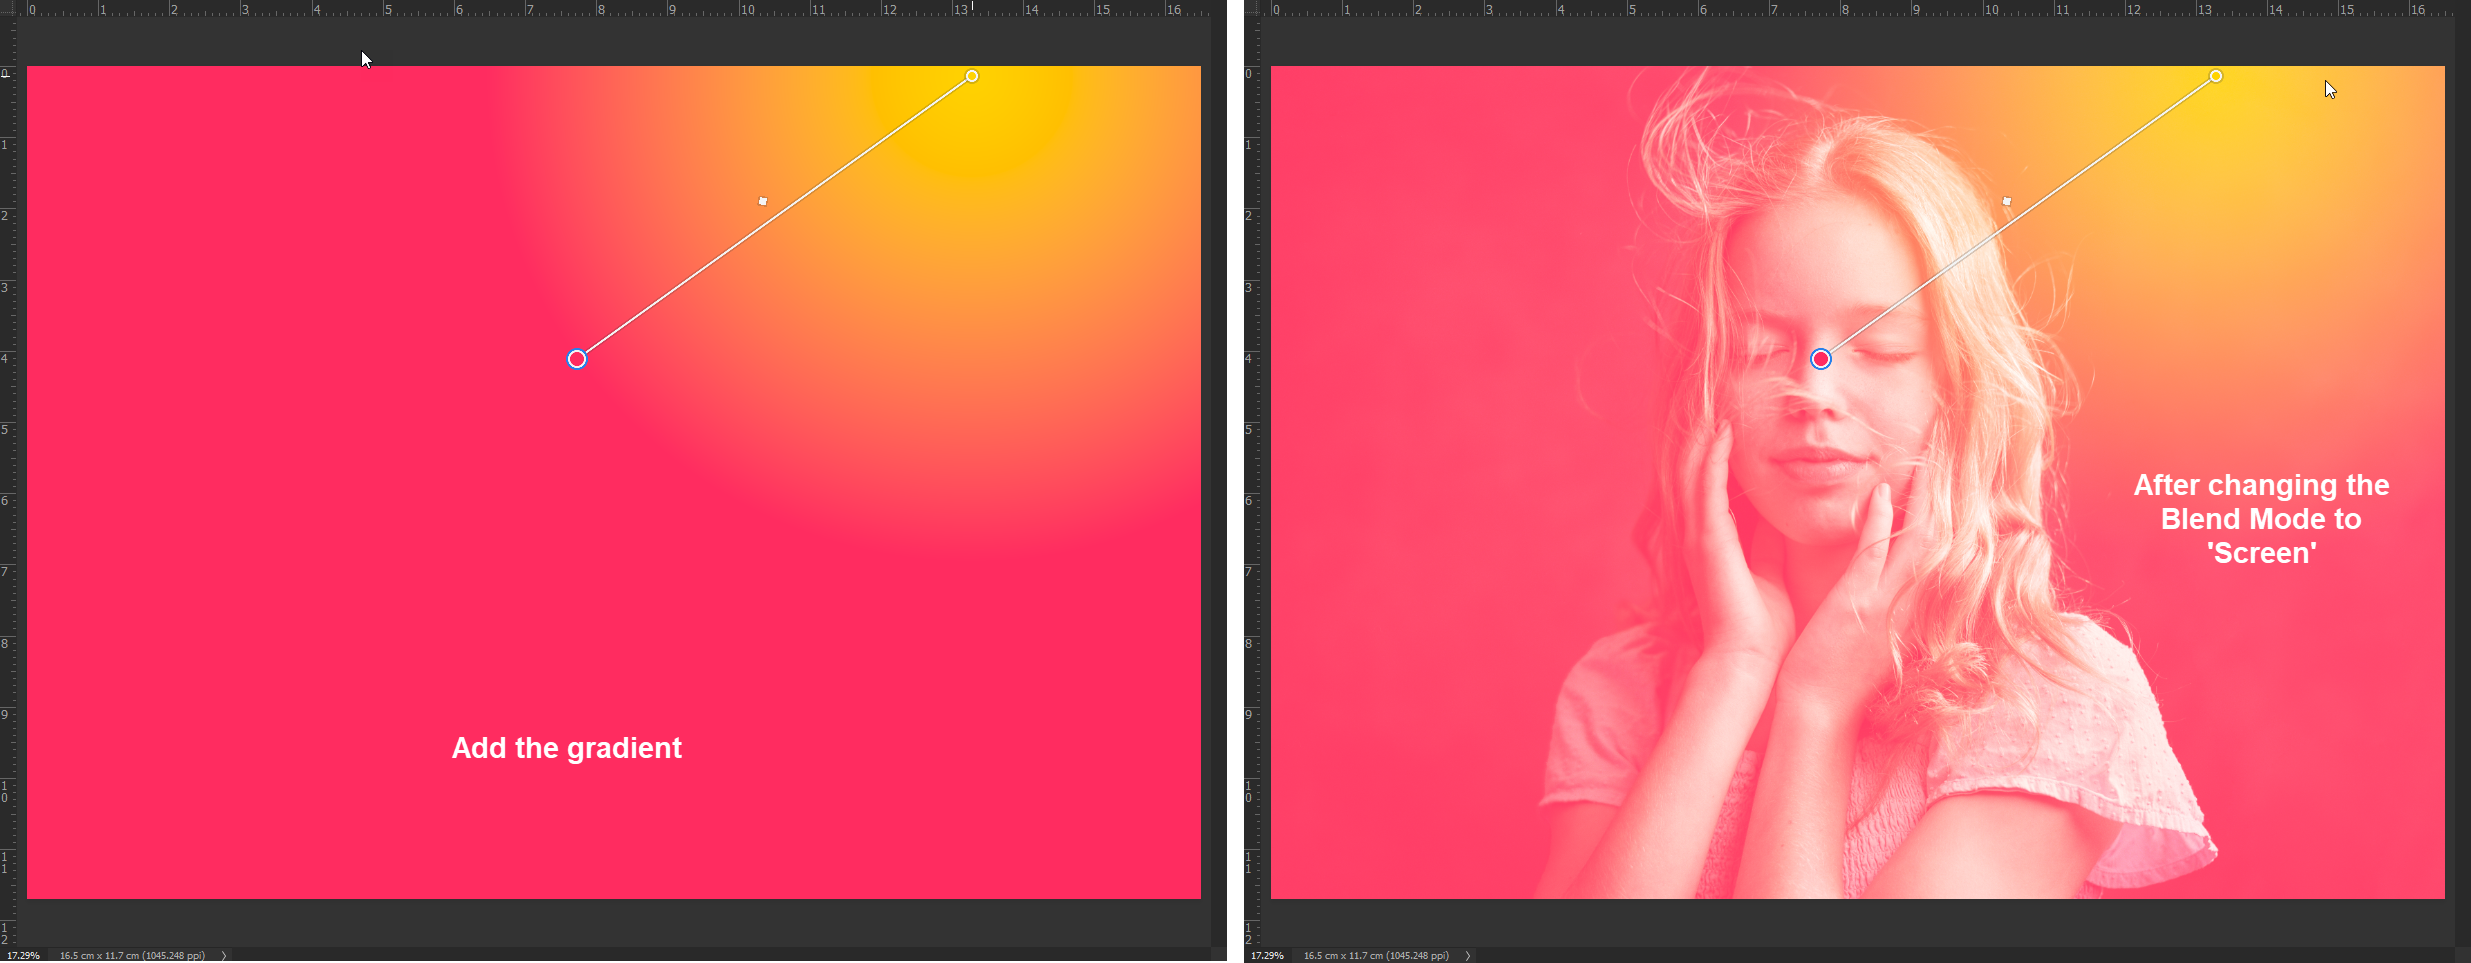
The exciting part of the 2023 Gradient tool is the new handles that you can see here. You can drag the gradient into position, click and adjust on end point colours, add new gradient stops, all while in this ‘live view’. Watch this short demo video to see it in action…..
Photoshop 2023 Live Gradient Tool Demo
LIVE GRADIENT TIPS:
Use the end points to either move the gradient around your workspace or to extend or make your gradient smaller.
The mid-point allows you to shift where the colours of the gradient blend
You can add more colour stops along your gradient by hovering below the gradient line and clicking
Similarly, if you want to remove a colour stop, pull and drag the colour stop downwards to delete
Gradients can work beautifully when blended into your photo edits. Experiment with different blend modes such as Screen, Lighten, Overlay and Soft Light
THE FOLLOWING TOOLS ARE CURRENTLY ONLY AVAILABLE IN PHOTOSHOP BETA
-
THE FOLLOWING TOOLS ARE CURRENTLY ONLY AVAILABLE IN PHOTOSHOP BETA -
GENERATIVE FILL
While this promises to be a very useful tool for some, I don’t think Adobe have quite yet mastered the AI integration as yet (probably why this is still only available on the Beta version of Photoshop at the time of writing this!).
Generative Fill is a tool that is driven by Adobe Firefly - Adobe’s own native AI image generator. Simply put, you make a selection of an area in your image, provide Photoshop with text prompts on what you want to fill in those selected areas, and wait for Photoshop to generate a number of variants based on your text input.
Here is an example of an image where I have selected the background. The text prompt I entered (after experimenting with different descriptive words) was:
“millions of tiny colourful butterflies fluttering around in the foreground and background softly blurred”

Here are some of the variants that Photoshop created. While I have only had a brief play around with the tool , I haven’t yet come up with anything that I am fully satisfied with. But I am keeping in mind it is still only early days for this tool and I imagine it will only get better. Watch the video demo below to get an understanding of how to use this exciting new tool.


Photoshop 2023 Generative Fill Tool Demo
GENERATIVE FILL TIPS
Smart selection is key. Be sure to select only the areas you want filled, and remember that Photoshop will feather the edge of the selection in order to blend in the new images. Keep your selection away from any areas you don’t want touched.
When inputting text prompts, use descriptive nouns to describe what you want to add and name its properties (for example, colour, lighting, texture, size, etc)
If you would like to just fill an area in with the surrounding objects or scenery, you can leave the prompt text box empty and let Photoshop use your image to work out what should fill the selected area.
So there you have it, our take on Photoshop's latest features in 2023. As educators who spend countless hours tinkering with photos, we can see how these new features will truly be a game-changer for many. Whether it's simplifying workflow, unleashing our creativity, or just making life a little easier, Photoshop has once again proved why it's the go-to tool for all my photo editing needs. So, what are you waiting for? Get your hands on these new features and let the magic begin!